Chrome OS Flex is free operating system from Google with purpose of giving life to old computer and laptops and making them capable of efficiently doing online tasks such as browsing or using Google Docs, sheets etc.
It is basically minimal version of Chrome OS that comes pre-installed on Chromebooks. This OS is cloud based, and has limited functionality.
System Requirements for Chrome OS Flex
The minimum system requirement for installing Chrome OS Flex include having a computer with:
- At least 4 GB of RAM
- 16 GB of internal hard drive storage
- Intel or AMD Processor
As you can see, there are no strict requirement for Chrome OS Flex. This is because the main aim of Google in releasing the tuned version of Chrome OS is to help visitors turn their old outdated computers into usable Chromebooks.
Steps to Install Chrome OS Flex
Before you proceed with installation, make sure your systems fulfils the minimum system requirements.
Pre-Requisites
- Google Chrome browser installed on your computer.
- A minimum 8 GB of USB Flash Drive.
Step 1: Launch Chrome on your computer and download Chromebook Recovery Utility. Click on “Add to Chrome” to install the extension.
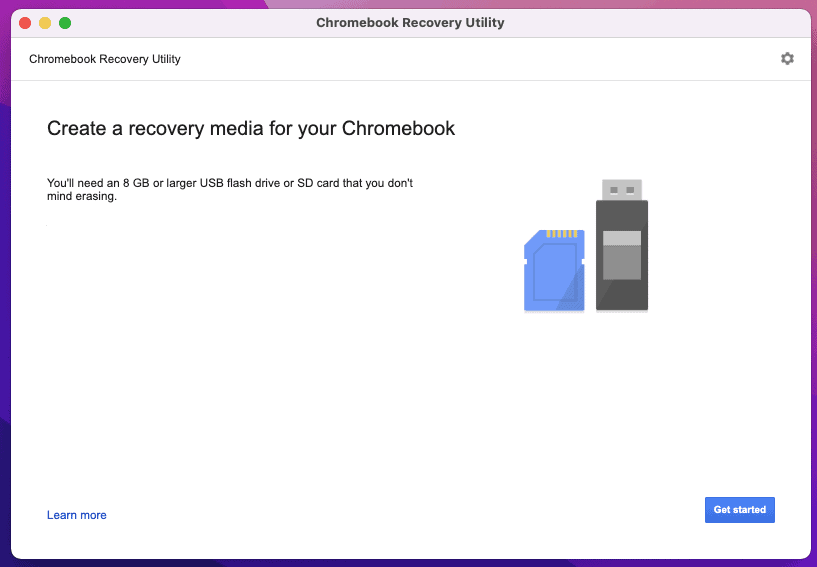
Step 2: Launch the Chromebook Recovery Utility in Chrome. On its main page, it will tell you that you need an 8 GB of USB flash drive.
Please note that the flash drive will be erased during the process, so make sure it does not have any of your important data that you care about.
Step 3: Click on “Get started” to start the process.
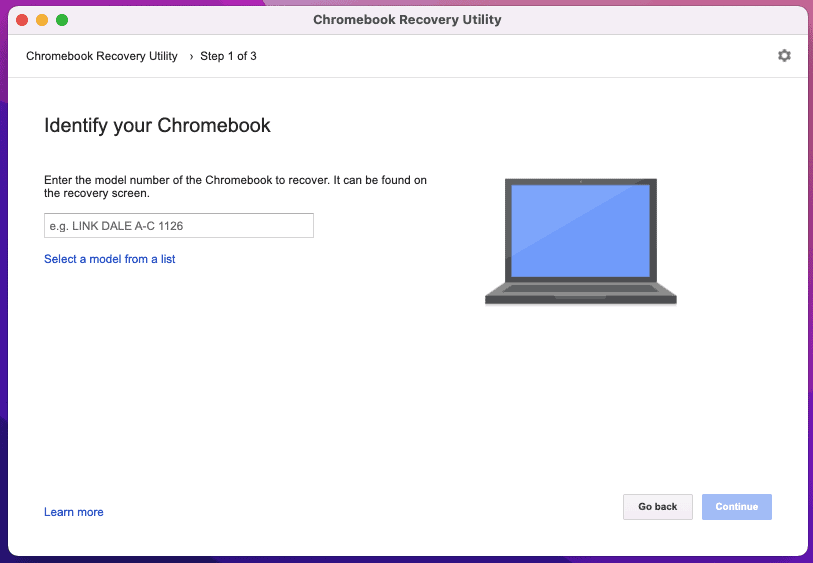
Step 4: On next page, you will get option to enter the model number of your Chromebook. Click on “Select a model from a list” as illustrated in the screenshot below.
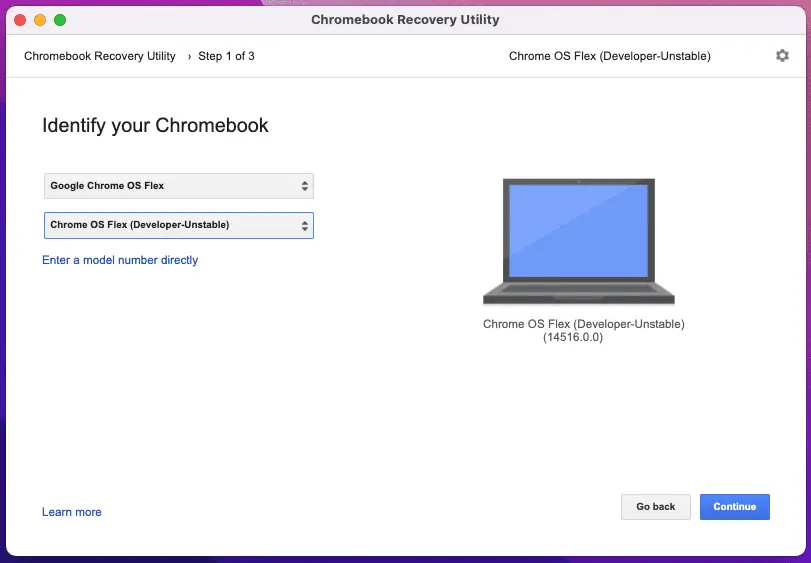
Step 5: Click on “Select a manufacturer”, and then click on “Google Chrome OS Flex” option. In “Select a product” file, select “Chrome OS Flex (Developer-Unstable)” option from the dropdown. After that, click on “Continue”.
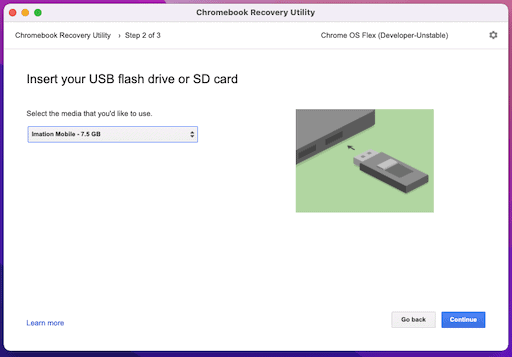
Step 6: Now insert your USB flash drive to your computer, select it from the list, and click on “Continue”.
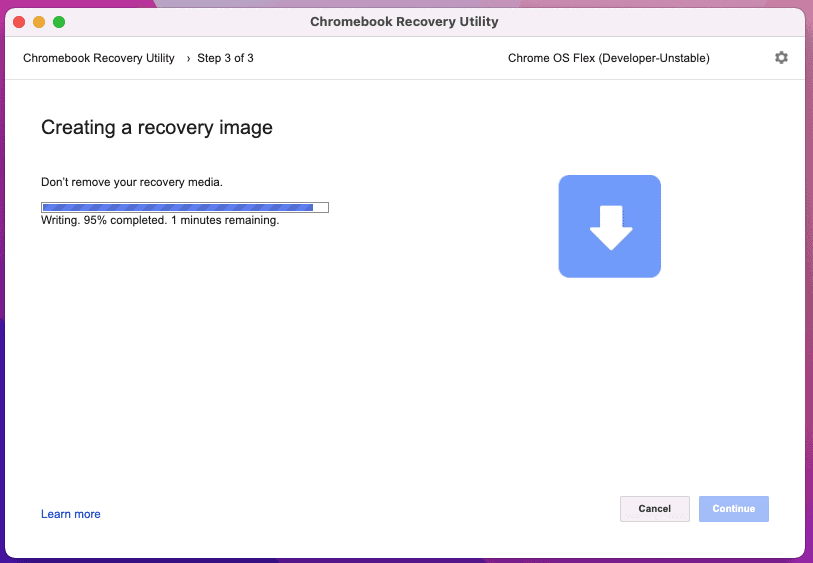
Step 7: On next window, click on “Create now” button. Now the recovery tool will start creating recovery image on your USB flash drive.

Please note that your USB flash drive will be erased during the process.
Don’t remove your USB flash drive during the process.
Step 8: Once the recovery drive is made, you will get option on your computer asking for permission to allow Chromebook Recovery utility to make changes to your connected flash drive. Select “Yes” to complete the process.
Once the process is completed, you will get a window with message stating “Success! Your recovery media is ready”.
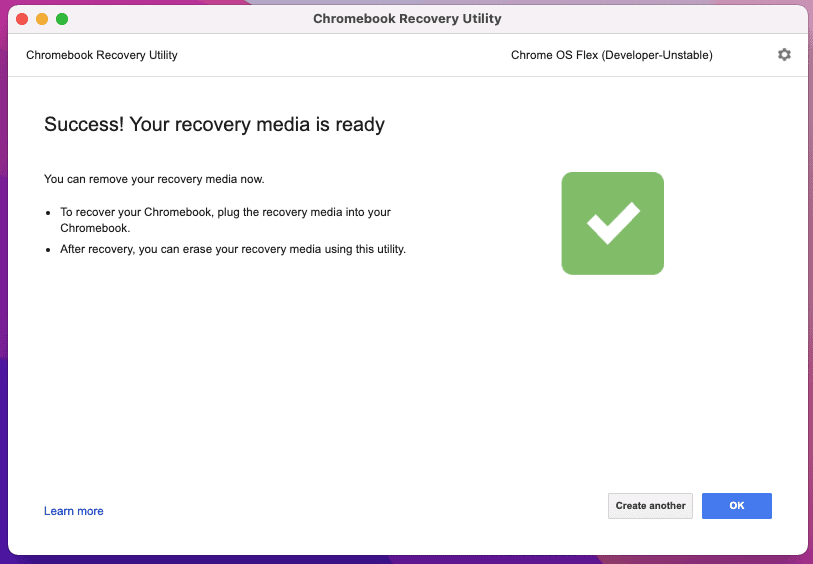
At this stage, you can remove the flash drive from your computer.
Step 9: Now that you have the bootable installer drive of Chrome OS Flex, it is time to install it. To begin, restart your computer with the usb drive plugged to it, and boot from the installer drive.
For that, you need to open to “Boot Manager” on your computer to select the USB drive from there.
Normally, it is accessed by pressing “F2” key on most computers, but it can vary, like on some computers, its shortcut key is “F12”, “F1″ or “F8”.
Step 10: On Boot Menu, select the USB flash drive you in the boot menu.
Step 11: When your PC successfully boots from it, you will see “Welcome to CloudReady 2.0” window. Click on “Get Started”.
Step 12: On next window, you will have 2 options. You can either try the Chrome OS Flex without installing by selecting “Try it first” option or you can clean install it on your computer by selecting “Install CloudReady 2.0” option.
We recommend to you first try it out and see how to it performs and if you are satisfied with it, only then clean install it.
Please note that when you install Chrome OS Flex on your computer using “Install CloudReady 2.0” option, it will completely erase all the data on your hard drive (complete hard drive) and not just on installation partition, so make sure you have already backed up your important data before you proceed.
Step 13: On next screen, select your Wifi network to connect to internet, or you may also use Ethernet if your computer has support for it.
Step 14: Next, you will be asked to sign in with your Google account, with option for data sync.
Step 15: On last installation screen, you are required to agree to terms and conditions. If everything goes correctly, you will be greeted with Chrome OS Flex welcome screen at end of this step.
Chrome OS Tips and Troubleshooting
Now that you have converted your old Windows laptop or computer or even Mac to Chromebook by installation of Chrome OS, it is time to master it.
Here are some of the best Chrome OS resources to help you master this new operating system and get most out of it:
Want to keep your Chrome OS powered laptop awake for longer time? Check this guide: Disable Sleep Mode in Chrome OS
Chrome OS has built-in functionality to record screens. Learn more about it here: How to Record Screen in Chrome OS without Any Extension
Minecraft fan? Well, don’t worry! You can install and play it on your newly converted Chromebook. Follow complete guide here -> How to Install and Play Minecraft in Chrome OS
Bluetooth not working after installing Chrome OS on your computer? Here’s how to troubleshoot it: Fix Bluetooth Not Working Problem in Chrome OS
Audio not working in Chrome OS? Check this detailed guide to troubleshoot audio problems in Chrome OS: Fix Audio Not Working Issue in Chrome OS
Roblox gamer? Why not install it on your new Chromebook? Check this out: How to Install Roblox in Chrome OS
Got into strange issues with Chrome OS? Restore it to factory settings by Powerwashing it. Check out this step by step by step guide: Restore Factory Settings in Chrome OS
Yes, Chrome OS has got its own task manager as well, just like Windows. Learn more about it: How to Open Task Manager in Chrome OS
Got new SD Card or USB Flash Drive? It is always recommended to format it before putting it to use. You can do that in Chrome OS as well. Guide: Format SD Card or Flash Drive in Chrome OS
Keyboard not working on your laptop after installing Chrome OS? Check this troubleshooting guide to fix it: How to Fix Keyboard Keys Not Responding in Chrome OS Problem
It is always recommended to uninstall the apps which are no longer in use on your Chrome OS computer. Not sure how to do it? Don’t worry! We have covered a detailed guide about that as well: How to Uninstall Apps in Chrome OS
Conclusion
We finally have a good operating system to put the old computers/laptops into use, thanks to Chrome OS Flex.
We hope that with the help of this detailed tutorial, you will be able to easily install Chrome OS Flex on your old Windows computer or laptop and make effective use of it.